Displaying Photos by Moment with Section Headers

One feature I knew I wanted Snapthread to have from very early on was the ability to display a user’s photo library in a similar way to the native Photos.app: scrolled to the bottom, sorted by Moment, with selectable sections. What I ended up implementing is actually closer to the Photos app within the Xcode device simulator: it can’t “zoom” in and out of Moment clusters, but it can display assets organized in sections by location and date.

I created a sample project to demonstrate how I did that and put it on GitHub. This is the first time I’ve ever shared code on GitHub, and I know it’s not particularly good, but if you run the project on your device you should see just what I described: your most recent photos and videos at the bottom of the collection view, sorted by Moment. The project loads the user’s first 25 Moments immediately, and then performs a background fetch for the rest, refreshing the collection view only if the user scrolls to the top of the currently loaded content.

There might be much better ways to accomplish this. I welcome any feedback!

Here’s the project link again, for those interested: SwiftyPhotoMoments on GitHub.

LiveRotate

This post could’ve easily been titled “I made an app with a two month old baby glued to me, AMA.” Of course, if it weren’t for Charlie, I wouldn’t have gotten the idea for the app in the first place! ?

It started with a giraffe.

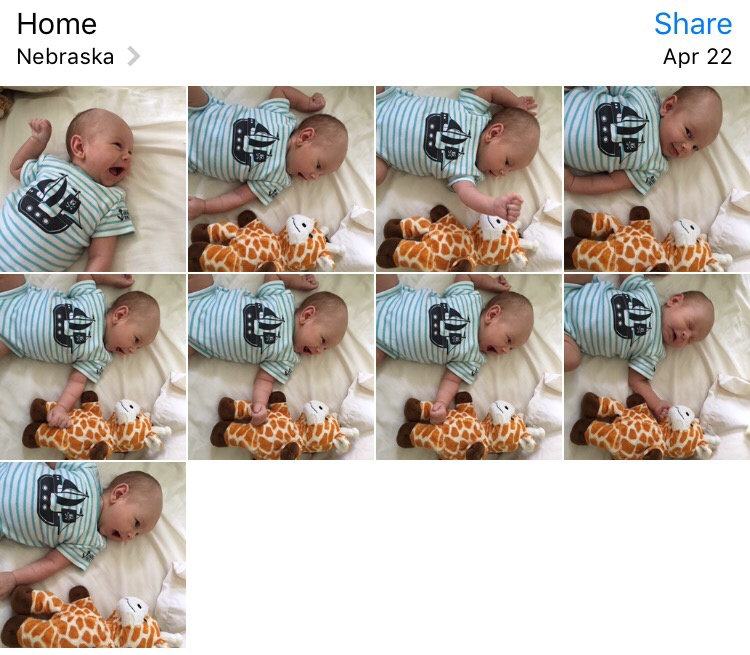
At the ripe old age of two months, Charlie enjoys things like smiling, staring at ceiling fans, getting his outfit changed (that one seems unusual), and of course, conversing with stuffed animals. By “conversing” I mean “looking intently, grinning, and occasionally yelling at.” One day I snapped a bunch of pics him speaking with his giraffe pal and this happened:

 Pics of Charlie and giraffe pal incorrectly rotated
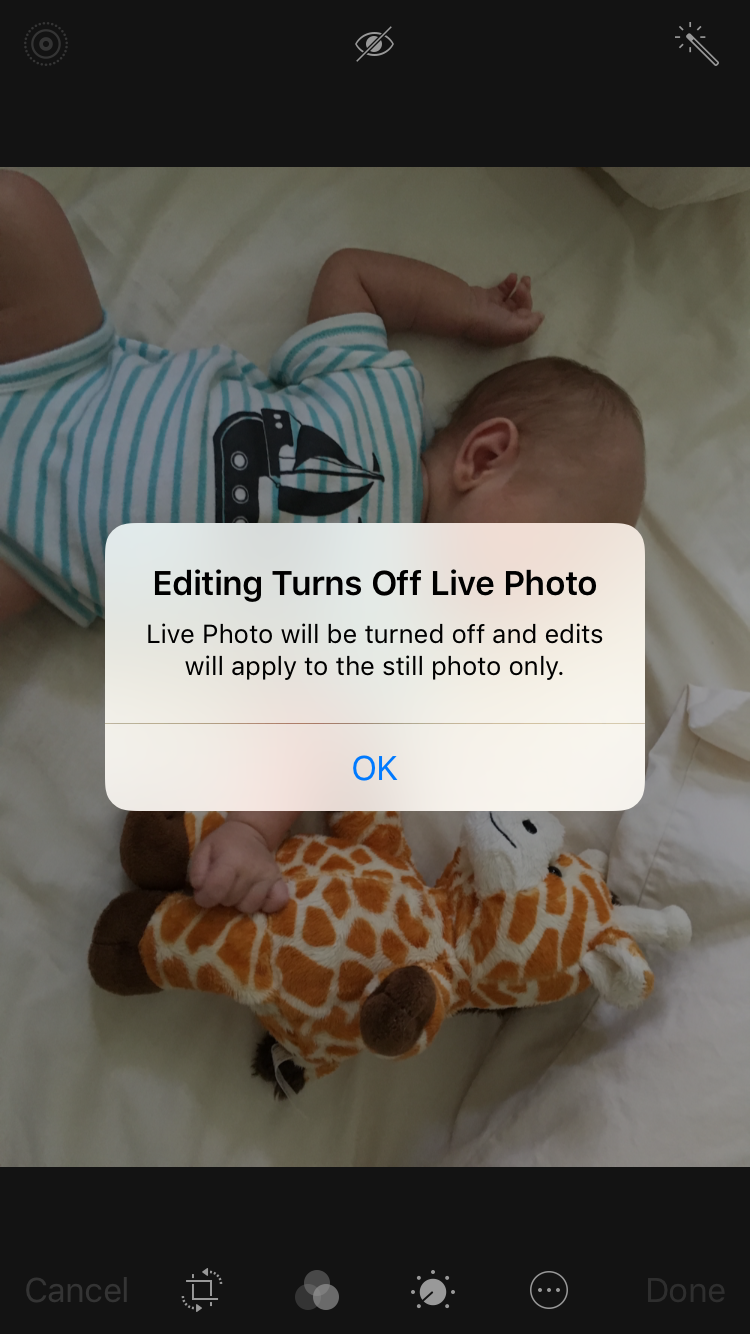
Whoops. I wasn’t paying attention and was tilting my phone in such a way that it thought I was holding it in portrait rather than landscape. When you attempt to edit a Live Photo beyond simply auto-correcting it, you get this message:

Editing will turn off Live Photo

At this point, I was kinda sad because the Live Photos were cute but weren’t captured as I intended. A few days later, I decided to do something about it.

Programming is fun!

I really enjoy writing code, especially when it requires me to learn a lot of new things. However, while I’m still really excited to finish my game, Corgi Corral, it’s officially on hold for two reasons:

  1. I don’t have the creative energy for it. Taking care of a baby who doesn’t sleep through the night has sapped me of the mental resources I need to make stuff like art and music. Someday!
  2. I’m interested to see what changes to GameplayKit and SpriteKit Apple will show off at WWDC. Maybe I’ll get some new ideas or will be able to improve my code in some way.

Even though I’m taking a break from Corgi Corral, I still have that itch to make something. So, I decided to dive head first into the Photos framework and create an app that rotates Live Photos.

It actually took me several weeks to get something working due to my lack of experience with both Core Image and AVFoundation (not to mention the fussy way that Live Photos are constructed). I’ll write more about the process of building the app in another post, but needless to say there were many headaches involved!

However, I still had a blast doing it. For the first time ever, I truly feel like a real app developer. Sure, my Bible verse app was fun to make, but there are a zillion Bible verse apps on the App Store. I haven’t found an app yet that can rotate Live Photos. Maybe one exists, maybe not, but I finally feel like I was able to identify a unique problem and build my own solution. It’s a powerful feeling!

Shipping things is fun!

Charlie & his giraffe

Confession: I love filling in all the blanks in iTunes Connect. The screenshots, the app preview video, the description…there’s something really satisfying about seeing my app’s profile come together. I even had fun making the screenshots, using David Verwer’s SimulatorStatusMagic to ensure the status bars looked nice and clean.

I don’t really know if there’s a market for this app. I mostly built it for myself, so I could enjoy my pictures of Charlie. Having it on the App Store is just the cherry on top. ? Still, it sure is fun to ship something—to be able to point to something and say “I made that.”

LiveRotate icon

The app is called LiveRotate (I decided to adopt _David Smith’s straightforward approach to naming apps) and it costs $0.99. Any money I happen to make will go towards purchasing the new MacBook Pro I’ve been dreaming of for the past two years!

Using SpriteKit’s Scene Editor for Simple Animations

When I began working on Corgi Corral, I knew I wanted to keep the game as simple code-wise as humanly possible. I wanted there to be one “LevelScene.swift” file that would handle the game logic for all of the levels in the game, and I didn’t want to clutter up that file with level-specific code for animating background/decorative sprites. In fact, I didn’t really want to write that code anywhere.

Enter the SpriteKit scene editor.

I know many developers prefer positioning things in code over using tools like Storyboards or the level/scene editor, but I personally love the ease of drag-and-drop positioning and the ability to preview what things will look like without building and running the app.

This morning, I decided to create and animate some twinkling lights on the fence that encloses the sheep pen. Here’s the end result (and yes, the sheep are wearing scarves):

Snow scene

I could have written something like this to animate the fence sprites:

let textures = [SKTexture(imageNamed:"twinkle1"), SKTexture(imageNamed:"twinkle2"), SKTexture(imageNamed:"twinkle3")]
let twinkleAction = SKAction.animateWithTextures(textures, timePerFrame: 1.0)
fence.runAction(SKAction.repeatActionForever(twinkleAction))

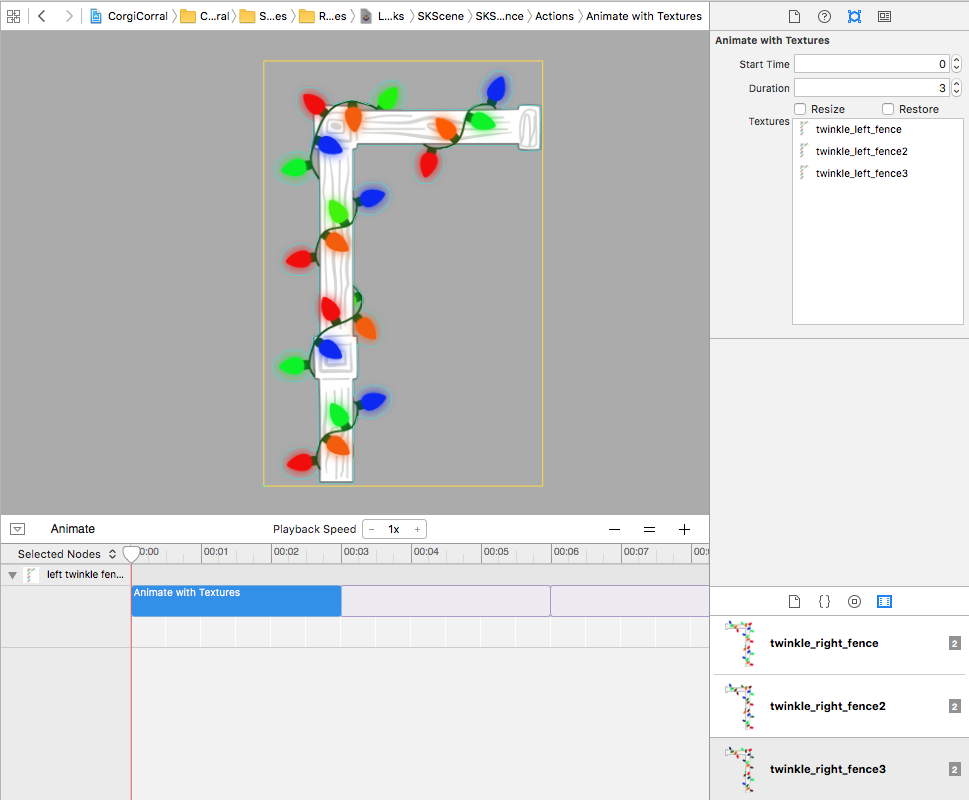
Instead, I decided to make the fence sprites SKReferenceNodes (in case I want to use them in another level) and animate them using the scene editor. To do that, I created an .sks file that matched the dimensions of the fence and placed the fence inside it. Next, I opened the animation timeline at the bottom of the editor and dragged in an “AnimateWithTextures” action from the object library on the lower right.

SpriteKit animation editor

After that, all I had to do was tweak the parameters in the attributes inspector on the right. I set the duration for 3 seconds and dragged my textures from the media library to the “textures” box in the attributes inspector. Finally, I set the animation to loop forever. When I added added the SKReferenceNodes to my scene, they animated automatically. Piece of cake!

Tutorial Request: SKFieldNode

Attn: Lovely SpriteKit experts who write tutorials

I’ve been looking for a decent tutorial covering SKFieldNodes—a neat, recent (I think?) addition to SpriteKit that includes things like magnetic fields and radial gravity fields. Unfortunately, my searches have come up completely dry, and Apple’s documentation hasn’t been particularly helpful.

What I want to do is this: create a field node with a region matching the size of an SKSpriteNode’s texture. When physics bodies make contact with the texture/region, they’ll spin briefly out of control, much like hitting a banana in Mario Kart. I think I can do this using a small vortex field, but I’m not quite sure how and wish I understood all the various properties better.

So anyway, I’m hoping some kind soul will either write up a tutorial or create a demo app that shows each type of field in a separate scene along with physics bodies to interact with. Please?

In the meantime, if I figure it out, I’ll let you know!

Swift “final” by default

I just finished listening to the latest episode of ATP where the hosts had an interesting discussion about the proposal to mark classes “final” by default in Swift. Let me first say that this whole topic is way over my head as a beginning programmer1. However, I just wanted to touch on my surprise and confusion when one of the guys basically said that subclassing is kinda on its way out. My reaction in a nutshell was: wait, what? Subclassing is pretty much all I do. What’s the alternative?

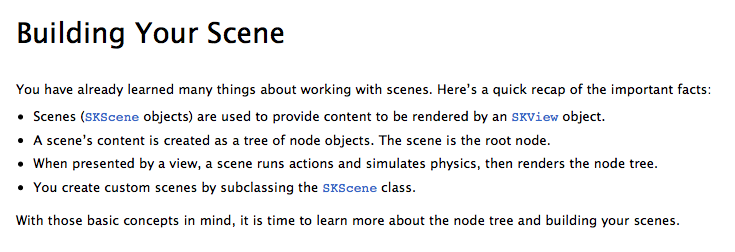
Here’s a little snippet from the SpriteKit Programming Guide.

SpriteKit programming guide

Note the last bullet point:

  • You create custom scenes by subclassing the <a href="https://developer.apple.com/library/ios/documentation/SpriteKit/Reference/SKScene_Ref/index.html#//apple_ref/occ/cl/SKScene" target="_self" data-renderer-version="2">SKScene</a> class.

It’s so matter-of-fact, right? To me, that says: this is what you do; this is the programming pattern you use. Obviously, SKScene was designed to be subclassed. Most of the SpriteKit framework was, actually (see the entire section on “Use subclassing to create your own node behaviors” within SpriteKit Best Practices). Search the iOS developer library for the word “subclass” and see how often Apple gives specific advice on how to subclass one of their framework classes.

From the UIColor class reference:

Most developers should have no need to subclass UIColor. The only time doing so might be necessary is if you require support for additional colorspaces or color models. If you do subclass, the properties and methods you add must also be safe to use from multiple threads.

Don’t get me wrong: I understand that this proposal only concerns the default setting and that this doesn’t mean that Apple will automatically lock their frameworks down completely. But that’s kinda what the discussion was about on ATP, and well…I guess I just wanted to point out that in the case of games, subclassing is more or less essential. Heck, Apple’s brand new GameplayKit framework relies enormously on subclassing for its Entities and Components system. Basically, it’s expected that you’re going to subclass GKComponent for each separate behavior/functionality that you need to assign to an entity.

Anyway, all of this is to say that if this proposal is accepted, I would expect that more often than not Apple’s framework classes would be marked “not final”…or whatever the opposite of final is. It seems to me like they’re already very explicit about what they don’t want you to subclass, and that those things are few and far between. For example:

You must not subclass the NSIndexSet class.

Not a lot of room for confusion there. But I guess we’ll see what happens once the “NS” prefix is dropped and everything is rewritten with a Swiftier mentality. Maybe Apple will lock more things down. At this point, however, I just don’t see why they would, and making “final” the default seems like it would create more headaches and more work than anything else, with the benefit being a sense of additional safety that perhaps hasn’t proved to be necessary.

  1. Seriously, don’t quote me. I literally don’t know what I’m talking about.

Herding Success

I finally found a decent fix for the GameplayKit/physics problem I’ve been fussing over for months (and that I wrote about yesterday). The good news is that it’s simple. The bad news is that it’s really only applicable to my particular game and probably won’t help anyone else that is looking for a way to get GKAgents to avoid the edges of the screen. Sorry! If it helps, I filed a radar about it.

Prior to figuring this out, I had just set my sheep to wander at a slow speed when they spawned. I set a low weight for the wandering goal because I mostly wanted them to flee from the corgi. I set the weight of each sheep’s fleeing goal high when the corgi approached, and back to zero when the corgi was farther away. I never changed the wandering goal.

The solution was to switch between the fleeing goal and the wandering goal, turning each completely on or off depending on the distance between sheep and corgi. I also assigned a higher weight to the wandering goal and increased the speed. Here’s the function that handles that logic:

func checkDistanceBetweenCorgiAndCritters() {
        enumerateChildNodesWithName("critter", usingBlock: { node, _ in
            let critter = node as! Critter
            let playerVector = CGPointMake(CGFloat(self.player.agent.position.x), CGFloat(self.player.agent.position.y))
            let critterVector = CGPointMake(CGFloat(critter.agent.position.x), CGFloat(critter.agent.position.y))
            let distance = self.distanceFromCGPoints(playerVector, b: critterVector)
            let maxDistance:CGFloat = 200.0
            
            if distance < maxDistance {
                critter.agent.behavior?.setWeight(100, forGoal: self.fleeGoal)
                critter.agent.behavior?.setWeight(0, forGoal: self.wanderGoal)
            } else {
                critter.agent.behavior?.setWeight(0, forGoal: self.fleeGoal)
                critter.agent.behavior?.setWeight(100, forGoal: self.wanderGoal)
            }
        })
    }

I call them critters instead of sheep so that I have some species-flexibility. ;) The above function borrows a method from Apple’s “AgentCatalog” demo project that calculates the distance between two positions. Now when the sheep get “stuck” along the edges, it’s only momentary because as soon as the corgi moves away, they’re super focused on wandering around.

https://www.youtube.com/watch?v=Grdr028WZFk

What’s Next
Here’s my short list of things to work on next:

  • Add some “flocking” behavior so the sheep tend to travel in cohesive groups.
  • Add a “run” animation for the corgi so it’s not just a legless blob.
  • Animate a little “+1” whenever a sheep enters the pen.
  • Add a pause menu with “resume” and “retry” options (and later an option to quit and return to the main menu).
  • Work on background art.

Spinning in Circles

I spent a long time messing with Corgi Corral yesterday. Too long, probably, because now I can hardly stand to look at it. I hear this is normal though, so I figured I’d take a break today and blog about it instead!

Awhile ago I wrote about the disconnect between GameplayKit’s agent system and SpriteKit’s physics world. I’m still working my way through these issues and have only managed to come up with partial, half-baked solutions. Specifically, I’m struggling with how to handle collisions between the sheep and the edge of the screen.

What Happens
When the sheep, who are part of the GameplayKit agent system, collide with the edges of the screen (an edge chain physics body), they “stick” to the edge and slide along it. Eventually, they all end up huddled against the edges of the screen.

What I’d Like to Happen
When the sheep collide with the edge of the screen, they should turn around and go the other direction.

My Failed Solution
I came up with something that almost works. When I detect a physics collision between the sheep and the edge chain, I run an SKAction that rotates the sheep in the other direction, like so:

sheep.runAction(SKAction.rotateByAngle(CGFloat(-M_PI), duration: 1))

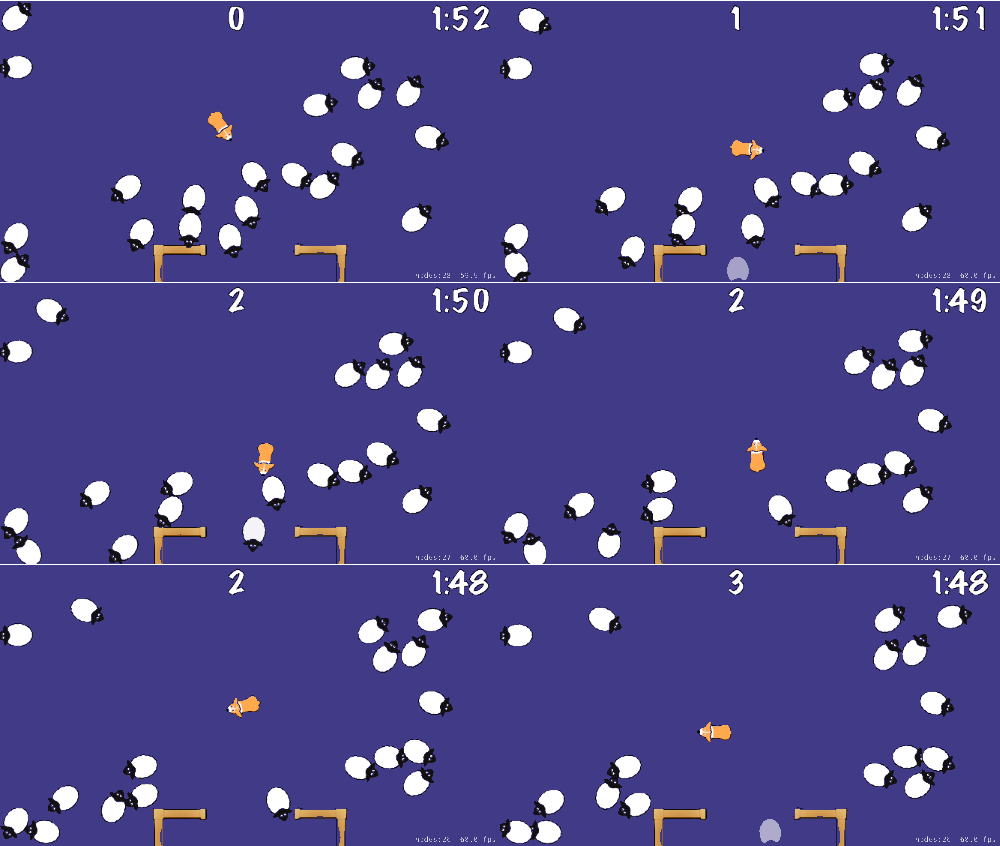
That actually works really well in most cases. The sheep hit the edge of the screen, turn around, and go the other way. The problem is that when they hit the corners, or get pinned between the wall and other sheep, then they spin pretty much indefinitely, like so (tap/click to play the GIF, note bottom left corner):

spinning sheep

They currently have circular physics bodies, but I’ve tried a variety of other shapes and they still get caught in the Spin Cycle of Doom.

Why This Problem Even Exists
In essence, GameplayKit’s agent system and SpriteKit’s physics system are in constant conflict. In the “agentDidUpdate” method, the position of the sprite is always reset to match that of its agent after the agent carries out its goals for that frame. Therefore, the agent system essentially overrides the physics system. So what’s the point of giving sprites with GKAgents physics bodies at all? Well, mostly to prevent them from passing through other sprites and to be able to be notified of collisions.

What Now?
I have three hazy ideas for solutions, but I could really use some help. Here’s my thought process so far:

  1. Maybe there’s something I could do in the agent delegate methods? There’s got to be a use case for those besides just setting the position of the agent and the sprite.
  2. Another idea was that after rotating the sheep, I could apply an impulse to propel it away from the wall. The problem is, I need to know which direction to propel it, and I don’t know how to figure out which edge of the screen it hit. I’m also wondering if this could cause a similar problem with the sheep bouncing around the corners, unable to break out of the back-and-forth pattern.
  3. I could find some way to use the agent system itself to keep the sheep away from the walls. So far, adding the edge chain as an “obstacle” and ordering the agents to avoid it doesn’t work—I suspect because the edge chain is just a line instead of something with actual volume. I could add some large, clear rectangular sprites along (but mostly outside) the bounds of the screen and add those as obstacles maybe?

So yeah, I don’t know. The documentation on GameplayKit is still lacking and the dev forums are pretty much dead. I’m hoping this year’s WWDC will bring some clarity and new features to this otherwise nifty framework.

Got an idea for me? Tweet at me: @bhansmeyer.

Creating an Outlined Countdown Timer in SpriteKit with Swift

There’s a reason that most game developers don’t use Apple’s tools: they’re very limited. For instance, with UIKit, you can create a label and easily adjust its stroke color and stroke width. With SKLabelNodes in SpriteKit, those properties don’t exist. Therefore, it is (as of iOS 9 and Xcode 7.2) impossible to create an outlined SKLabelNode without doing some extra work.

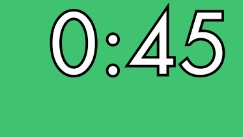
I want my countdown timer in Corgi Corral to be white with a black outline. I combined two excellent tutorials to do this: Creating a Countdown Timer in SpriteKit with Swift and Outline Text in SpriteKit. Here’s the end result:

countdown timer with outline

In order to do this, you’ll need to use the great custom class ASAttributedLabelNode by Alex Studnicka. Just download the zip file from GitHub and copy the ASAttributedLabelNode.swift file into your project.

The timer tutorial has you create a custom subclass of SKLabelNode, adding several functions that compare dates and allow the label to update itself. I changed it to be a subclass of ASAttributedLabelNode instead and added two extra functions: one that formats the time as M:SS (single digit minutes and seconds) and one that sets the attributes of the string (stroke width, color, font, etc.). Here’s the full class:

class CountdownTimer: ASAttributedLabelNode {
    
    var endTime: NSDate!
    
    
    func update() {
        let remainingTime = timeLeft()
        attributedString = stringFromTimeInterval(remainingTime)
        
    }
    
    func startWithDuration(duration: NSTimeInterval) {
        let timeNow = NSDate()
        endTime = timeNow.dateByAddingTimeInterval(duration)
        
    }
    
    func hasFinished() -> Bool {
        
        return timeLeft() == 0
    }
    
    func createAttributedString(string: String) -> NSMutableAttributedString {
        let font =  UIFont(name: "Futura-Medium", size: 65)
        let textAttributes = [
            NSFontAttributeName : font!,
            // Note: SKColor.whiteColor().CGColor breaks this
            NSForegroundColorAttributeName: UIColor.whiteColor(),
            NSStrokeColorAttributeName: UIColor.blackColor(),
            // Note: Use negative value here if you want foreground color to show
            NSStrokeWidthAttributeName: -3
        ]
        return NSMutableAttributedString(string: string , attributes: textAttributes)
    }
    
    func stringFromTimeInterval(interval: NSTimeInterval) -> NSMutableAttributedString {
        let interval = Int(interval)
        let seconds = interval % 60
        let minutes = (interval / 60) % 60
        let timeString = String(format: "%01d:%02d", minutes, seconds)
        return createAttributedString(timeString)
    }
    
    private func timeLeft() -> NSTimeInterval {
        
        let now = NSDate()
        let remainingSeconds = endTime.timeIntervalSinceDate(now)
        return max(remainingSeconds, 0)
    }
}

Next, all you have to do is create a new CountdownTimer in your game’s scene class (by default it’s called GameScene.swift). Assuming your timer is named “timer”, whenever you want the timer to start, call timer.startWithDuration(seconds). In the scene’s update method, you can simply put timer.update().

Note: The end result of this is that you get an SKNode that you can do all sorts of SpriteKit-y things with. However, since it’s not actually an SKLabelNode, the vertical and horizontal alignment methods won’t work. You’ll have to position it like a regular node.

Obviously you can change the font to whatever you want, as well as the time format. And if you want to be able to have multiple timers with different attributes, you could always override the initializer to take a font name, size, color, etc. In fact, I might do that just to make it more flexible. Anyway, hope this helps somebody!

Waiting for Review Day 5: Adding an Activity Indicator to a UIWebView in Swift

One feature that I really wanted to add to Refining Fire was the ability to read the entire chapter for a randomly chosen Bible verse. So for instance, if the verse was Psalm 23.4, a user could read all of Psalm 23. I decided to use a UIWebView to display the chapter content from a popular Bible-reading website.

Sometimes the website would take a moment to load and at first glance, it seemed like the feature was broken. I knew I needed to add some kind of spinner or loading bar but wasn’t sure how to tie a UIActivityIndicatorView to the loading of a web page. After searching Stack Overflow, I found the simplest solution. Here’s what it looks like in Swift after declaring a UIActivityIndicatorView called “spinner” and a UIWebView called “webView”:

    override func viewDidLoad() {
        super.viewDidLoad()
        
        spinner.hidesWhenStopped = true
        
        webView.delegate = self

        let url = NSURL(string: urlString)
        let urlRequest = NSURLRequest(URL: url!)
        webView.loadRequest(urlRequest)
        
    }
    
    func webView(webView: UIWebView, shouldStartLoadWithRequest request: NSURLRequest, navigationType: UIWebViewNavigationType) -> Bool {
        spinner.startAnimating()
        return true
    }

    func webViewDidFinishLoad(webView: UIWebView) {
        spinner.stopAnimating()
    }
    
    func webView(webView: UIWebView, didFailLoadWithError error: NSError) {
        spinner.stopAnimating()
    }

Don’t forget to add UIWebViewDelegate to the class definition!

Note: This is the fifth entry in a series of posts about writing my first iOS app. The app is currently in review, and until it is rejected or approved, I plan to write something every day about what I’ve learned.

Waiting for Review Day 1: Creating a pre-populated Core Data database

Guess what? I finally did it. I submitted my first app to the iOS App Store around 2am this morning. It feels so unbelievably great to have actually finished something (well, as much as any 1.0 can be “finished”). As it’s now waiting to be reviewed by someone from the App Store team, I thought I’d write one post every day during the waiting period, describing the app and what I learned from making it. A quick note before I go any further though: it is a Bible verse app, so if you don’t want to hear about that, this would be a good time to stop reading.

The Idea

My first idea for an app was a sort of non-traditional To-Do list app. It seemed like a neat concept and well-suited for a beginner, but after messing around with it for a few months I realized it wasn’t quite coming out the way I’d hoped. I felt slightly discouraged—that is, until I got my Apple Watch on April 24. Because I am a Christian and my faith is very important to me, one of the first things I did upon receiving my watch was look for an app that would allow me to view Bible verses on my wrist.

As of this writing, there are about a dozen watch apps that show up when you search for “bible verses” in the App Store. They fall into roughly two camps: apps that display daily verses, and apps that allow you to read the entire Bible. I wasn’t really looking for either one of those. What I wanted was an app that would allow me to hit “refresh” and see a new verse whenever I wanted, without having to wait for the next day. At first, I thought I could create the whole thing using just a Glance; however, when I learned that Glances must be static and can’t have any buttons, I set out to build a full-fledged app. According to Xcode, I started the project on April 30.

First Steps: Creating a database

I knew I would need a database of verses to pull from, and that I would need to decide what translation(s) to use. Because I didn’t feel like messing with copyright issues, I decided to build my own database using translations that are in the public domain: the World English Bible and King James Version. I pasted the verses into a Google spreadsheet with columns for the verse text, reference, and translation.

Next I needed to figure out how to get that data into my app. I stumbled upon a Ray Wenderlich tutorial that described how to create a command line utility app for OS X that would basically spit out a pre-filled SQLite database for use with Core Data. I liked the idea of shipping my app with the database already populated, so even though the tutorial was old (iOS 5!), I decided to give it a try. Translating it into Swift was surprisingly easy, but then I hit a problem: the tutorial used a JSON file, and all I had was a spreadsheet.

I feel the need to reiterate that I have no computer science/programming background, and know next to nothing about databases. For all I know, it’s probably ridiculously easy to parse a CSV file. However, my tutorial used JSON, and so I did what any self-respecting woman with over 20 years of Microsoft Office experience would do: I did a mail merge. Yes, I literally mail merged my spreadsheet into a Word document so that it matched proper JSON syntax, and then converted it to plaintext and threw a “.json” at the end. If you’re an experienced programmer and that’s the most ridiculous thing you’ve ever read: you’re welcome. ;-)

Anyway, in case any of you want to use that Ray Wenderlich tutorial with Swift, here is what I did:

  • I pasted the boilerplate Core Data stack into a new Swift class called “DataManager.”
  • After starting a new Xcode project for my iOS app and setting up Core Data, I copied my Core Data class called “Verse” and my .xcdatamodeld file from that project into the command line utility app project.
  • I copied my newly created “Verses.json” file into the utility app project.
  • Note: there are a couple changes you have to make to the Core Data stack code. You can find those changes in the tutorial.

Here is the code for my main.swift:

import Foundation
import CoreData

var dataManager = DataManager()

// Get JSON data
var err:NSError? = nil;
let jsonURL = NSBundle.mainBundle().URLForResource("Verses", withExtension: "json")
let jsonData = NSData(contentsOfURL: jsonURL!)
let verseArray = NSJSONSerialization.JSONObjectWithData(jsonData!, options: NSJSONReadingOptions.AllowFragments, error: &err) as! NSArray

// Seed Core Data
if let managedObjectContext = dataManager.managedObjectContext {
    for item in verseArray {
        let verseText = item.objectForKey("text") as! String
        let verseReference = item.objectForKey("reference") as! String
        let verseTranslation = item.objectForKey("translation") as! String
        
        var verse = NSEntityDescription.insertNewObjectForEntityForName("Verse", inManagedObjectContext: managedObjectContext) as! Verse
        verse.text = verseText
        verse.reference = verseReference
        verse.translation = verseTranslation
        verse.isFavorite = false
        
        var e: NSError?
        if managedObjectContext.save(&e) != true {
            println("insert error: \(e!.localizedDescription)")
        }
    }
}

Tomorrow, I’ll talk about how I set up Core Data so that it could be accessed by my iOS app, Watch extension, and Today View Widget.