When I began working on Corgi Corral, I knew I wanted to keep the game as simple code-wise as humanly possible. I wanted there to be one “LevelScene.swift” file that would handle the game logic for all of the levels in the game, and I didn’t want to clutter up that file with level-specific code for animating background/decorative sprites. In fact, I didn’t really want to write that code anywhere.
Enter the SpriteKit scene editor.
I know many developers prefer positioning things in code over using tools like Storyboards or the level/scene editor, but I personally love the ease of drag-and-drop positioning and the ability to preview what things will look like without building and running the app.
This morning, I decided to create and animate some twinkling lights on the fence that encloses the sheep pen. Here’s the end result (and yes, the sheep are wearing scarves):

I could have written something like this to animate the fence sprites:
let textures = [SKTexture(imageNamed:"twinkle1"), SKTexture(imageNamed:"twinkle2"), SKTexture(imageNamed:"twinkle3")]
let twinkleAction = SKAction.animateWithTextures(textures, timePerFrame: 1.0)
fence.runAction(SKAction.repeatActionForever(twinkleAction))
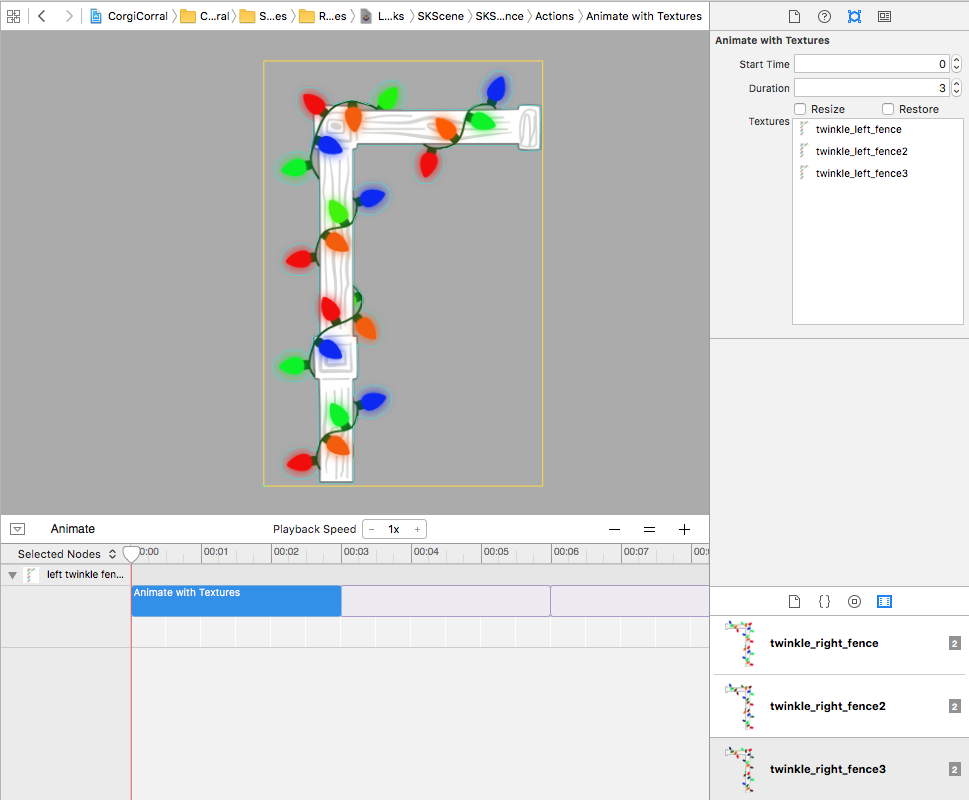
Instead, I decided to make the fence sprites SKReferenceNodes (in case I want to use them in another level) and animate them using the scene editor. To do that, I created an .sks file that matched the dimensions of the fence and placed the fence inside it. Next, I opened the animation timeline at the bottom of the editor and dragged in an “AnimateWithTextures” action from the object library on the lower right.
After that, all I had to do was tweak the parameters in the attributes inspector on the right. I set the duration for 3 seconds and dragged my textures from the media library to the “textures” box in the attributes inspector. Finally, I set the animation to loop forever. When I added added the SKReferenceNodes to my scene, they animated automatically. Piece of cake!
