I Forgot to Take Videos

I forgot to take videos for the first few days after my son Charlie was born. I made sure to pack a couple nice cameras in my hospital bag, and recall struggling against the harsh lighting in my recovery room (not to mention the constant stinging of my incision) to snap some semi-decent photos of my new little bundle. It felt like enough at the time, though now I wish I had done a little more.

Maybe I should have shelled out for the professional photographer. I definitely should have insisted my husband take more pictures of me holding Charlie. And I should have taken some videos, too. Over the past two years countless friends have had babies, and many of them took videos of some of their earliest moments. I find myself wishing I had done the same.

In a way though, I did. I was using an iPhone 6s when Charlie was born. I took a few photos of him at the hospital to easily send to family and friends, and of course took many [thousands] once we finally got home. I’ve always had Live Photos enabled, so each one of those snapshots recorded a tiny 3-second clip.

The clips are shaky, low-quality, and mostly lack sound (because the little guy was sleeping), but there’s just something about them. I’m glad they’re there. They add some “concreteness” to a time of my life that seems like a blur, in a way that a photo alone couldn’t quite accomplish.

When I’m considering how to record a moment, I almost always favor photographs over videos. After all, you can’t really hang a video on your wall. Live Photos make that choice even easier, and with an app like Snapthread, I can still salvage a great moment from a sub-par photo.

My hope for the future of Live Photos is that we won’t have to choose between taking the highest quality photo and capturing those precious little videos. Having portrait mode and adjustable depth data is amazing, but hearing my little boy’s laugh years later is perhaps even more so.

If all goes according to plan, I’ll be going in for a scheduled cesarean section two weeks from tomorrow and we’ll finally get to meet our little girl. You can bet I’ll be taking even more Live Photos (and longer videos too) this time around.

If you use Snapthread to share some of your favorite moments publicly, I’d love it if you’d use the hashtag #snapthread or tag @snapthread (either on Twitter or Instagram) in your post so I can find them. And if you’ve written an article or blog post about how Live Photos in general have affected your life, I’d love to read that too!

The Making of LiveRotate

I thought it might benefit other beginners if I wrote up an overview of how I went about building LiveRotate. (Spoiler alert: there was a lot of Googling involved!)

Starting the Project

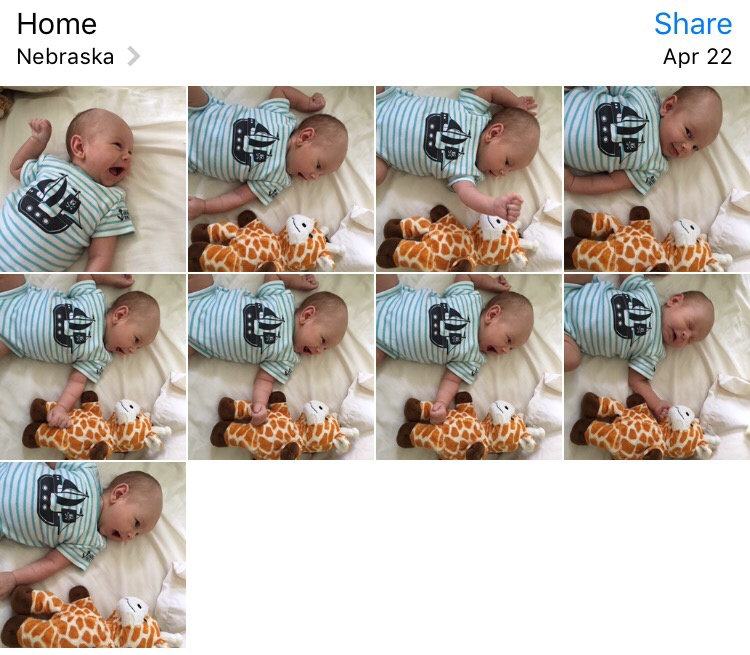
When I began, I didn’t have the foggiest idea how PhotoKit worked, and I had all but forgotten how to use collection views, which help you display things in a grid. So, I turned to Apple to see if they had a sample project for the Photos framework and luckily, they do. It has even been updated to “illustrate the use of LivePhoto APIs.” Right on! ?

I then translated almost the entire thing, line by line, into Swift. I’m not joking. I needed the code for the collection view, for displaying a Live Photo with a badge, and for caching thumbnails as you scroll, and that was honestly the bulk of the project (if anybody needs any of that code in Swift, just let me know!). As I translated the code, I learned what each piece did, so that I wouldn’t just be blindly copying things without building up my understanding.

Handling Rotation

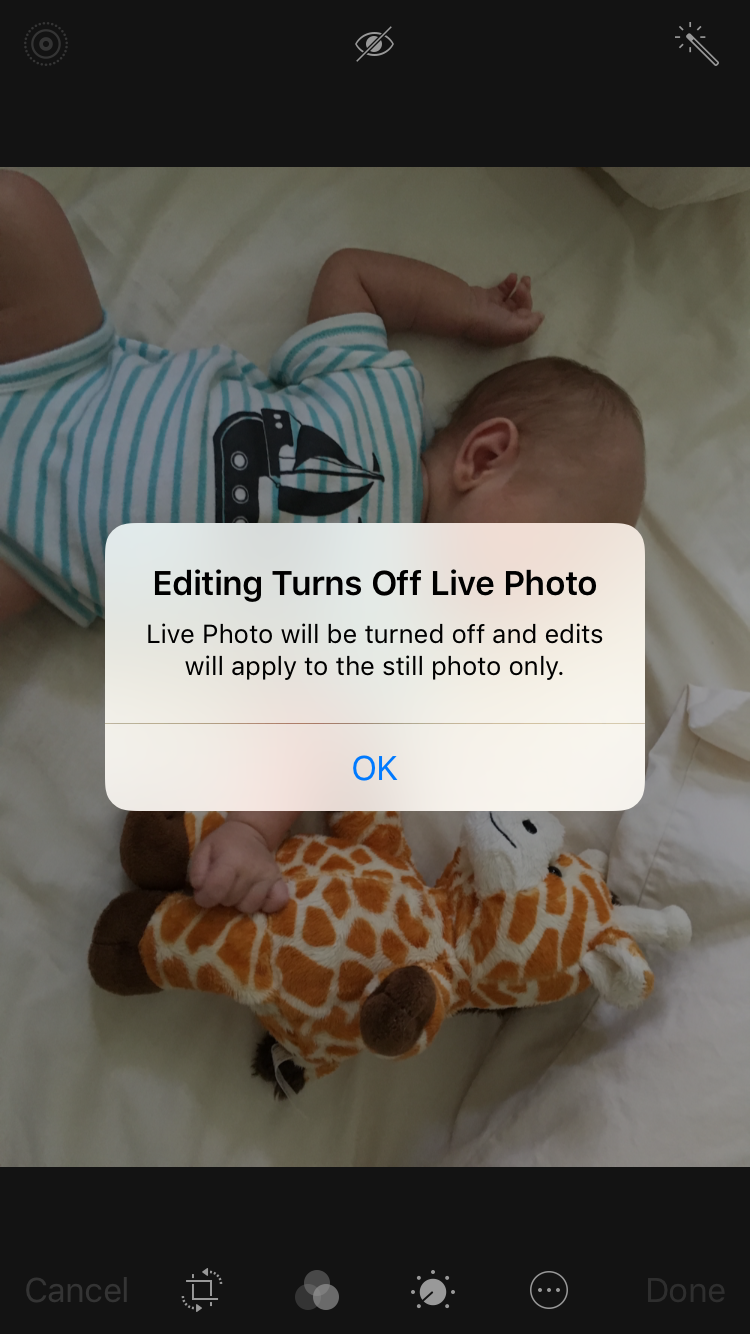
Deciding how to rotate the photos was confusing at first because there are two ways you can do it. There are rotation flags that determine how a photo is displayed on a device (but that flag may not be respected by all programs/devices). Or, I could “physically” rotate the bits using some kind of transform. Option B seemed like the right way to go, so I set about learning two new frameworks: Core Graphics for the JPEG part of the Live Photo and AVFoundation for the Quicktime Movie part.

Rotating Photos

There are three types of image-related classes in iOS: UIImage, CGImage, and CIImage. For a beginner, that was SUPER CONFUSING (and still sort of is). Some more searching led me to a category for rotating CIImages by 90 degrees. The Swift equivalent of an Objective C category is an extension. So, I translated that code as follows:

extension CIImage {
    
    func imageRotatedByRadians(radians: CGFloat, imageOrientation: UIImageOrientation) -> CIImage {
        let finalRadians = -radians
        var image = self
        
        let rotation = CGAffineTransformMakeRotation(finalRadians)
        let transformFilter = CIFilter(name: "CIAffineTransform")
        transformFilter!.setValue(image, forKey: "inputImage")
        transformFilter!.setValue(NSValue(CGAffineTransform: rotation), forKey: "inputTransform")
        image = transformFilter!.valueForKey("outputImage") as! CIImage
        
        let extent:CGRect = image.extent
        let translation = CGAffineTransformMakeTranslation(-extent.origin.x, -extent.origin.y)
        transformFilter!.setValue(image, forKey: "inputImage")
        transformFilter!.setValue(NSValue(CGAffineTransform: translation), forKey: "inputTransform")
        image = transformFilter!.valueForKey("outputImage") as! CIImage
        
        return image
    }

Here’s an overview of the photo rotation steps:

  1. Request the photo data using PHAssetResourceManager
  2. Create a CIImage from the data and use the extension to rotate it
  3. Add appropriate metadata (more on this later), convert the resulting image to a JPEG and save it to a temporary location

Rotating Videos

Rotating the video portion of the Live Photo turned out to be much, much trickier. This Technical Q&A from Apple describes which methods actually rotate the buffers and which only set a rotation flag. In order to rotate the video, I needed to use an AVExportSession and apply a transform.

There are 4 orientations that a photo or video may be captured in. I made this convenience method to take the video’s original transform and return information about it.

func orientationFromTransform(t: CGAffineTransform) -> (orientation: String, isPortrait: Bool) {
        var assetOrientation = "Up"
        var isPortrait = false
        if t.a == 0 && t.b == 1.0 && t.c == -1.0 && t.d == 0 {
            assetOrientation = "Right"
            isPortrait = true
        } else if t.a == 0 && t.b == -1.0 && t.c == 1.0 && t.d == 0 {
            assetOrientation = "Left"
            isPortrait = true
        } else if t.a == 1.0 && t.b == 0 && t.c == 0 && t.d == 1.0 {
            assetOrientation = "Up"
        } else if t.a == -1.0 && t.b == 0 && t.c == 0 && t.d == -1.0 {
            assetOrientation = "Down"
        }
        return (assetOrientation, isPortrait)
    }

Each of those 4 orientations could then be potentially rotated 3 different ways: 90 degrees, -90 degrees, and 180 degrees. When you rotate the video, you rotate it around its origin point, which can potentially move the video out of the frame. Therefore you have to apply a translation to get it back to where it’s supposed to be. Derek Lucas (@derekplucas) got me started by creating a Playground that rotated videos on the Mac. I took his translation values and had to tweak them, via trial and error, to get it to work on iOS. Here’s just a small sample of what that hot mess looks like:

var adjustY = videoSize.width
var adjustX = CGFloat(0)

if (radians == CGFloat(-M_PI_2)) {
            if orientation == "Right" || orientation == "Up" {
                adjustX = videoSize.height
                adjustY = 0
            } else if orientation == "Left" {
                adjustX = videoSize.width
                adjustY = -1 * videoSize.width / 4
            } else {
                adjustX = videoSize.width
                adjustY = -1 * videoSize.height / 4
            }
        }

Once rotated, I saved the video to a temporary file.

Live Photo Metadata

You can’t just throw any two photos and videos together and make a Live Photo without doing a little extra work. I found this project by genadyo on GitHub that shows what sort of metadata must be written into the photo and video files in order for them to be paired up correctly.

Basically, you have to do 5 things:

  1. Create an identifier of some kind, assign it to the key kFigAppleMakerNote_AssetIdentifier (which is “17”) in a new dictionary and set that dictionary as the kCGImagePropertyMakerAppleDictionary for your JPEG file.
  2. Create an AVMetaDataItem where the key is “com.apple.quicktime.content.identifier” and the value is the identifier you created in the first step.
  3. Create an AVMetaDataItem where the key is “com.apple.quicktime.still-image-time” and the value is 0. For some reason, this is required in order for iOS to recognize it as a true Live Photo.
  4. Use AVAssetWriter to re-save the video you made using AVExportSession, this time writing in the appropriate metadata. Of course, if you aren’t rotating the video, you could just use AVAssetWriter from start to finish.
  5. Save both the photo and the video to Photos like so (where “fileURLs” is an array containing the two temporary URLs for the photo and video):
     PHPhotoLibrary.sharedPhotoLibrary().performChanges({
                    let request = PHAssetCreationRequest.creationRequestForAsset()
                    
                    request.addResourceWithType(PHAssetResourceType.Photo, fileURL: fileURLs.first! as NSURL, options: photoOptions)
                    request.addResourceWithType(PHAssetResourceType.PairedVideo, fileURL: fileURLs.last! as NSURL, options: videoOptions)
                    
                    }

Conclusion

I started LiveRotate on April 27 and finished it on June 6, so it took just a little over a month to make. I’ve had some good suggestions for improvements to the app and hope to implement those soon. For now, though, my brain can finally break free from “obsessive coding” mode and focus on important things like catching up on household chores and cooking some real food! ?
Edit: 4:35 pm CDT

I forgot to add that I created the app’s icon in Photoshop CS6, and translated it into German, Spanish, Italian and Russian via a hilarious process of changing my phone’s language, opening up apps that had the words/phrases I needed, and screenshotting them. I know—I’m a dang thief!

LiveRotate

This post could’ve easily been titled “I made an app with a two month old baby glued to me, AMA.” Of course, if it weren’t for Charlie, I wouldn’t have gotten the idea for the app in the first place! ?

It started with a giraffe.

At the ripe old age of two months, Charlie enjoys things like smiling, staring at ceiling fans, getting his outfit changed (that one seems unusual), and of course, conversing with stuffed animals. By “conversing” I mean “looking intently, grinning, and occasionally yelling at.” One day I snapped a bunch of pics him speaking with his giraffe pal and this happened:

 Pics of Charlie and giraffe pal incorrectly rotated
Whoops. I wasn’t paying attention and was tilting my phone in such a way that it thought I was holding it in portrait rather than landscape. When you attempt to edit a Live Photo beyond simply auto-correcting it, you get this message:

Editing will turn off Live Photo

At this point, I was kinda sad because the Live Photos were cute but weren’t captured as I intended. A few days later, I decided to do something about it.

Programming is fun!

I really enjoy writing code, especially when it requires me to learn a lot of new things. However, while I’m still really excited to finish my game, Corgi Corral, it’s officially on hold for two reasons:

  1. I don’t have the creative energy for it. Taking care of a baby who doesn’t sleep through the night has sapped me of the mental resources I need to make stuff like art and music. Someday!
  2. I’m interested to see what changes to GameplayKit and SpriteKit Apple will show off at WWDC. Maybe I’ll get some new ideas or will be able to improve my code in some way.

Even though I’m taking a break from Corgi Corral, I still have that itch to make something. So, I decided to dive head first into the Photos framework and create an app that rotates Live Photos.

It actually took me several weeks to get something working due to my lack of experience with both Core Image and AVFoundation (not to mention the fussy way that Live Photos are constructed). I’ll write more about the process of building the app in another post, but needless to say there were many headaches involved!

However, I still had a blast doing it. For the first time ever, I truly feel like a real app developer. Sure, my Bible verse app was fun to make, but there are a zillion Bible verse apps on the App Store. I haven’t found an app yet that can rotate Live Photos. Maybe one exists, maybe not, but I finally feel like I was able to identify a unique problem and build my own solution. It’s a powerful feeling!

Shipping things is fun!

Charlie & his giraffe

Confession: I love filling in all the blanks in iTunes Connect. The screenshots, the app preview video, the description…there’s something really satisfying about seeing my app’s profile come together. I even had fun making the screenshots, using David Verwer’s SimulatorStatusMagic to ensure the status bars looked nice and clean.

I don’t really know if there’s a market for this app. I mostly built it for myself, so I could enjoy my pictures of Charlie. Having it on the App Store is just the cherry on top. ? Still, it sure is fun to ship something—to be able to point to something and say “I made that.”

LiveRotate icon

The app is called LiveRotate (I decided to adopt _David Smith’s straightforward approach to naming apps) and it costs $0.99. Any money I happen to make will go towards purchasing the new MacBook Pro I’ve been dreaming of for the past two years!

An Even Better Live Photo Editor

Alive! As it turns out, an exclamation point can make a world of difference. While Alive (my previous fave) is still a great Live Photo to GIF converter, Alive! ($1.99) is so much more. Alive! is basically the VSCO or Instagram of Live Photos.

There are 22 filters you can choose from and you can also fine tune things like brightness, contrast, saturation, warmth, sharpness, etc. There are four settings for both GIF quality and speed (you can even have the GIF play backwards). The speeds range from 0.5x to 2.0x and the quality from Low (240×320) to Highest (540×720). You can also export Live Photos as a movie with the ability to adjust the overall volume and with three options for both Video size and Quality.

Alive! Filters

The Export menu offers four options: Save as Regular Photo, Save as Live Photo, Export as a Movie, or Export as GIF. When I chose the GIF export, it brought up two options: Share on Twitter, or More Sharing Options. The latter brought up the usual iOS share sheet, where I was able to save the GIF straight to Dropbox.

My only nitpick with this app is there’s no way to edit the length of the Live Photos. In other words, you can’t crop or trim them in any way. However, the filters and image adjustments totally make up for that. Here’s a Live Photo-turned-GIF of our calf, Molly, using the Icarus filter and Medium GIF quality:

MollyLivePhoto

Molly likes to be petted.

Anyway, if you want to up your Live Photo game considerably, go buy Alive!. It’s worth it.