Why It’s Still Hard to Get Started with App Development

Since the announcement of Swift at WWDC in 2014, there has been an explosion of tutorials designed to introduce non-programmers to the world of iOS app and game development. Just take a look at my “Swift Resources” page and you’ll see what I mean (and that’s only a fraction of them!). There are app camps aimed at both kids and adults, projects that can be completed entirely in Swift playgrounds, and more books than you can shake a stick at—yet for beginners, the whole experience can go from rewarding to frustrating rather quickly.

Hello World

The first projects you complete as a total newbie can be super fun and satisfying. They can take you from never having written a line of code in your life to having a working to-do app on your phone that YOU made. That feels awesome! Most tutorials focus on simple apps like checklists and Flappy Bird clones, but that’s to be expected and it helps build confidence, language literacy, and the ability to think like a programmer.

The problem is, most beginners don’t decide to pursue app development because they have a simple idea. Yes, of course everyone has to start somewhere, but there seems to be a need for resources that help bridge between beginner material and intermediate and advanced concepts.

The Internet is Scary…and Expensive

Creating a game or an app that does not rely on Internet connectivity to function may be the best place to start, but it’s not where many people want to finish. If you have an idea for any kind of social app or an app that uses another company’s API, the difficulty curve suddenly gets very, very steep. It also starts to get expensive.

Think about a weather app. A weather app needs to pull weather data down from a service. The best of these services, such as Dark Sky’s public API, aren’t free—or are free only up to a certain point. When you’re a single person paying out of pocket for API access, you pretty much have to charge money for your app (or hope that it doesn’t become popular). But wait: if you charge only once, that may not be enough to cover your costs down the road. So what then? Do you require people to subscribe to your weather app? You can see how pricing can become a problem.

Now think about an app with any kind of social component. Apple’s App Store Review Guidelines rightly include this requirement:

17.5 Apps that include account registration or access a user’s existing account must include a privacy policy or they will be rejected

Ok, but how do you write a privacy policy? After all, you just learned programming; now you have to learn policy writing? Additionally, you have to have a place to store that user account data. Do you operate your own server, or pay to host the data somewhere else? The former requires a LOT more learning (not to mention liability), while the latter has proven to be risky in its own ways (see the shutdown of Parse).

Advanced Concepts

This isn’t to say that there aren’t resources out there for learning about complex things like concurrency, unit testing, debugging, etc. But let me just say that I’ve been working on this for awhile and I still don’t understand the three things I just mentioned. Part of the reason is that many of the tutorials I’ve found assume prior knowledge that I just don’t have. The “Instruments” tool in Xcode? Yeah…I’ve never opened it. Another hard concept is syncing, especially if you want your app to function both online and offline. These are things that most apps and app developers rely on, and yet the path from to-do app to whatever-you’re-dreaming-of is significantly murkier and harder to navigate than the one from non-programmer to “Hello World.”

Reality Check

No, you don’t need a Computer Science degree to program an app. But you might need a Computer Science degree to make the app you want to make. And if not a degree, then perhaps a careful viewing of some of Stanford’s free iTunes courses. Because while a well-written one-page tutorial can teach you how to make your own version of Tetris or Space Invaders, it probably can’t bring you to a full understanding of multi-threading, or server management, or working with Notifications, or what the heck all those weird build settings in Xcode mean. (Note: I still need to follow through on this advice myself!)

So is it possible to be a self-taught app developer and create a complex, Internet-connected app? Of course. But it’s probably going to take longer than you think and when it does: don’t be discouraged. You’re not stupid. Keep asking questions and getting feedback, make and release smaller projects in the meantime, and don’t give up!!
February 2nd – Progress Update

Between baby-related activities and the ridiculous snowstorm that swept through the Midwest last night, I haven’t had a chance to work on Corgi Corral for a few days. However, a lot of things came together rather quickly last week, so I do have some progress to report (no screenshots, though).

Accomplishments

  • After the time runs out, the game now displays your score, high score, and the name of the medal you’ve earned (bronze, silver, gold or none). The medal name will eventually be replaced by an image.
  • On the Options screen, there is a toggle to turn the sound effects on and off (and it works!).
  • iAds are set to appear on menus, but not in-game. I don’t plan to use a backup ad service, so countries that don’t display iAd won’t ever see them, which is fine.

What’s Next

I’m to the point where I can’t stand not having menu art or an app icon…so yeah. Looks like it’s time to close Xcode, open Affinity Designer, and try to make some passable artwork! I’m about as much of an artist as I am a programmer (which is to say, I sit squarely in the “amateur” category), so we’ll see how this goes! Just wait til I get to the music… ;)

January 25th – Progress Update

It’s been a week since I last blogged; here’s what I’ve been up to!

Accomplishments

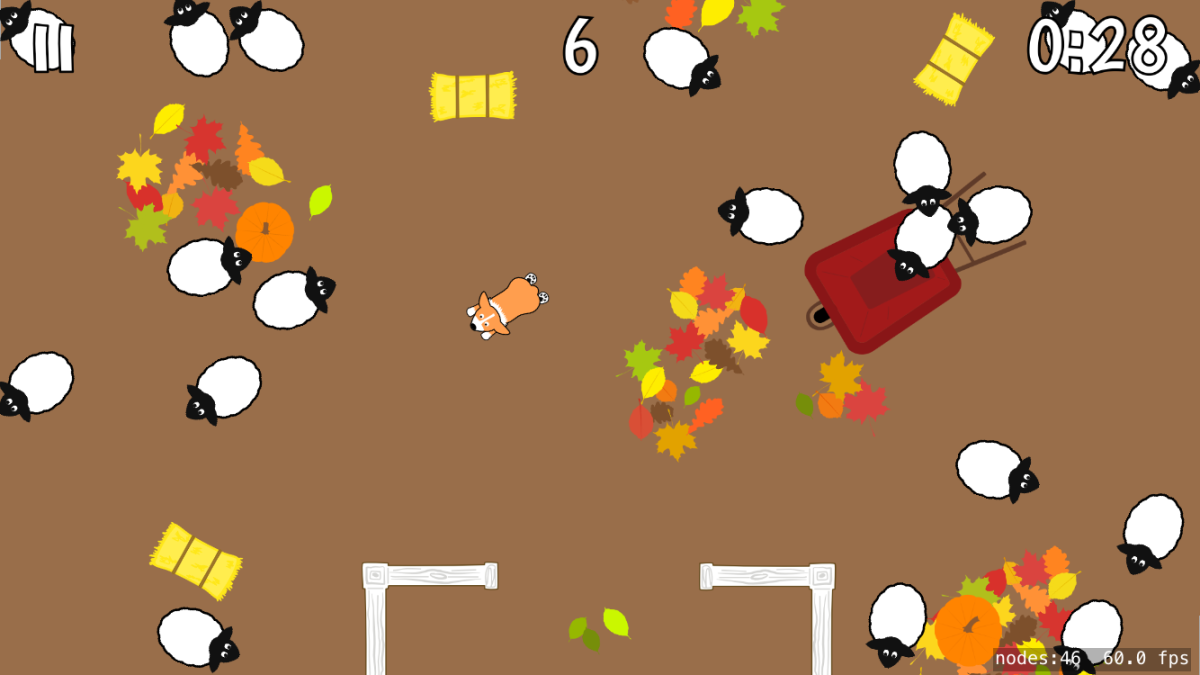
  1. I created some art assets for the second level/scene, which has an autumnal theme. The screenshot below shows a funny bug (now fixed) in which a sheep would spawn in the wheelbarrow and be unable to escape.

    Corgi Corral Level 2

  2. The corgi now blinks when idle and barks occasionally during the game.
  3. I created a struct called “LevelConfiguration” that reads information from a property list. The list contains information like how many animals should spawn, what the time limit should be, what sounds should be used, etc.
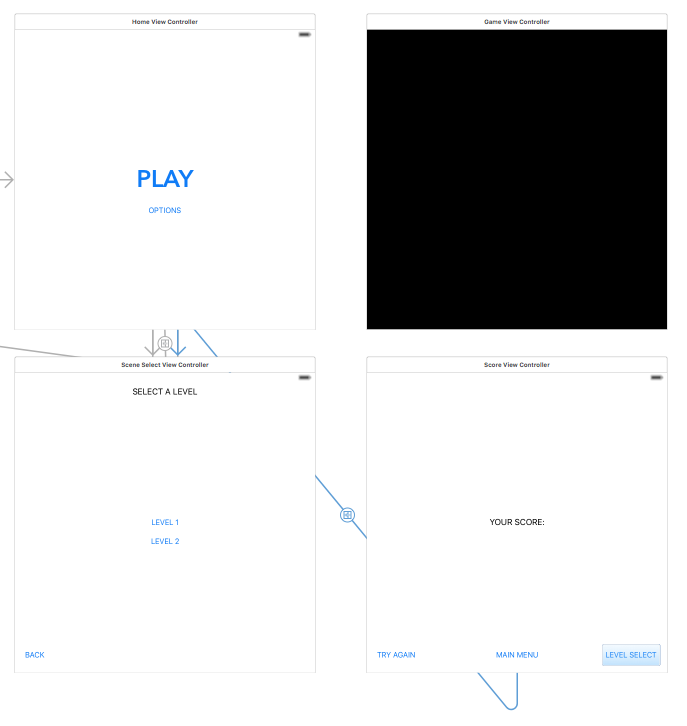
  4. For scene management, I decided to abandon the idea of a SpriteKit-only solution and ran back to something I’m more familiar with: UIKit and Storyboards. I set up bare-bones view controllers with simple UIButtons and UILabels that players can use to navigate to and from the main menu, options screen, etc. They’re not pretty, but they work, and now all I have to do is create art assets for them:

    Storyboard Layout

  5. After the timer for a level runs out, the game now waits 3 seconds and displays a score summary screen with options to retry the level, select a different level, or return to the main menu.

Under Consideration

Here are a couple of things I’m mulling over:

  • Whether to have the different levels/scenes progressively unlock, or to make them all available from the beginning.
  • Implementing a “medals” system similar to the one used in Flappy Bird with bronze, silver, and gold levels depending on how many critters you herd into the pen. And then maybe you’d need at least a bronze medal to unlock the next level? I don’t know. Still thinking about it.

What’s Next

Now that I have a very simple menu structure set up, it should be relatively painless for me to set up things like iAd, sharing a score via the share sheet, and adding an option to turn off the sound effects. My goal from now until the baby is born in March is to make it so that the only thing I have left to do is add the art, music, and remaining sound effects.

It looks like I started the Xcode project on November 20th, which means I’ve been working on this for a little over two months now (and sometimes only for a couple hours a week). With that in mind, and knowing that it’ll take me a long time to do graphics and music, I’m hoping it’s reasonable to expect the game to be ready to ship sometime before my birthday in July!

January 18th – Progress Update

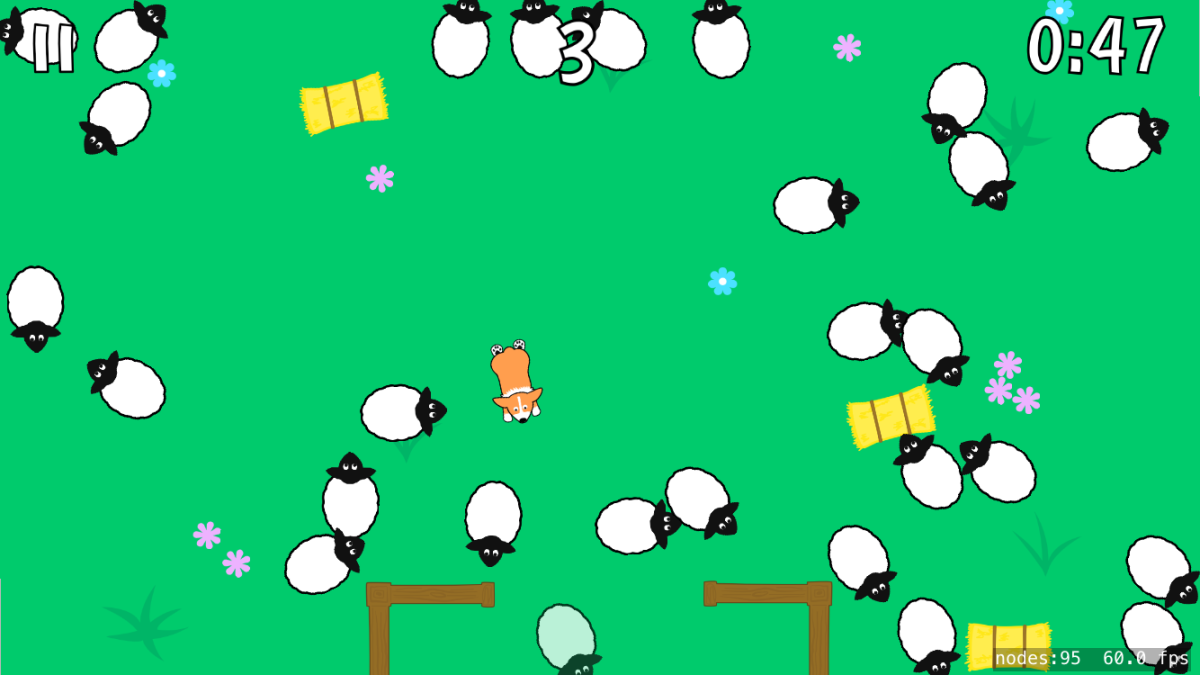
Corgi Corral Jan 2016

Time for a game progress update!

Things I’ve gotten done

  1. The game now detects the angle you are holding your device when you start playing and sets that as the starting point for accelerometer updates. Previously I had hard-coded some neutral orientation values.
  2. Game states! Now the game is more gamey and less proof-of-concepty. You can tap to start the game, pause and resume it, and start a new game after a “game over” message is displayed. It’s all pretty bare bones but it works.
  3. Animations. I’ve never animated anything before so they’re kinda rough, but the corgi now “runs” and the sheep blink at random times when idle.
  4. Sound effects. I edited some sheep sounds from freesound.org and put them in the game. Personally, I think they’re hilarious. I also learned how to convert audio files to Apple’s Core Audio Format via the command line.

Things I decided not to do

  • Add “flocking” behavior to the sheep. I tried adding some separation, cohesion, and alignment goals to the sheep and I actually didn’t like how it made them behave. There’s nothing wrong with the goals themselves, but when combined with the “wandering” and “fleeing” goals, they just don’t function well enough. It’s also kind of funnier to have the sheep running every which way without any concern for one another.
  • Animate a “+1” when a sheep enters the pen. I decided to animate the score label instead; it quickly scales up and down when the score increases. The sheep also “baaa” when they enter the pen, which I think is much more satisfying.

Things I plan to work on next

The game is now to a point where I have to start working on its overall structure. In other words, it’s going to have to be more than just one scene file and a “LevelScene.swift” class. I need to set it up to accommodate multiple levels and multiple scenes (such as “Menu” and “Options”).

I think I need to make some sort of “level configurator” that loads the details for each level from a .plist. Then I need to create some kind of “scene manager” that can switch between the menu, options, level selection, and also load the correct level. This is all incredibly new to me so I imagine it will take quite awhile to figure out. In fact, this is the part I’ve been dreading because I hardly know where to start. I think I’ll spend time examining Apple’s “DemoBots” sample code (which just came out, so it’s written in Swift and includes the latest APIs) to see how they set up the level loading and switching.

I’ll let you know what I come up with! :)

Time to Make a Game Plan

Most seasoned game devs would probably say that you should start the development process by writing a game design document (GDD). The GDD describes your game’s hooks, characters, objectives, audience, etc. in enough detail that it can serve as the primary reference for you and your team.

Well, I don’t have a team, or a design document. Instead, I started with a concept and hoped to eventually turn it into a game. Now that I have a better idea of how that concept works in practice, I figure it’s time to start nailing down some of the specifics.

Initial elevator pitch: Corgi Corral is a casual, tilt-based herding game that offers fun for all ages. You play as an adorable Welsh Corgi with one job: to herd as many frenzied animals into their pen as possible before time runs out. Avoid obstacles, chase away predators, and try to beat your best score in 9 colorful levels.

Some more game details: I haven’t figured out the perfect time limit for each level yet, but I’m guessing it will be 1-2 minutes. It’s gotta be quick: something you can play while waiting in line.

I’m planning to implement two power-ups that spawn randomly and infrequently:

  • A little clock that you can tap on to add 5 seconds to the game time
  • A “magnet” power up that temporarily draws all of the animals toward the middle of the screen (and away from the edges…yay!). This will either look like a magnet and make a “buzzing” sound when you tap it, or a sheep/cow bell that rings when you tap it. I’m leaning towards the latter, because I think it better fits the character of the game.

As for the aforementioned predators, I’m thinking they’ll wander onto the screen and move slowly toward the pen. If they reach the pen, you lose a couple points from your score. All you have to do to make them go away is chase them off screen.

Monetization: I’ve been going back-and-forth about this a LOT. Personally, I prefer to play games that are paid-up-front with no in-app purchases. However, this is my first game, and although I’d like to add levels in the future, the initial experience will be relatively limited. Right now it’s more important for me to get something out there than to make something mind-blowing. So, with that in mind, I think Corgi Corral will be tastefully ad-supported. By “tastefully” I mean that ads will only be shown on the main menu and the “game over” screen…never during gameplay. And there will of course be an option to remove ads altogether.

So, there you have it! I’m going to spend the rest of my game dev time today with my notebook and pen, knocking out a few more things that will help me move forward such as: what game states I need to set up, what options I will need to record in NSUserDefaults, what information I need to include in the plist for each level, and what scores or achievements the game should highlight.

Swift “final” by default

I just finished listening to the latest episode of ATP where the hosts had an interesting discussion about the proposal to mark classes “final” by default in Swift. Let me first say that this whole topic is way over my head as a beginning programmer1. However, I just wanted to touch on my surprise and confusion when one of the guys basically said that subclassing is kinda on its way out. My reaction in a nutshell was: wait, what? Subclassing is pretty much all I do. What’s the alternative?

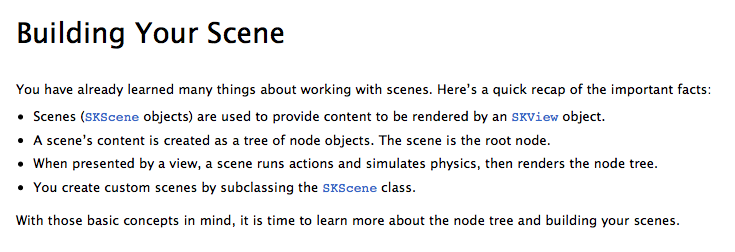
Here’s a little snippet from the SpriteKit Programming Guide.

SpriteKit programming guide

Note the last bullet point:

  • You create custom scenes by subclassing the <a href="https://developer.apple.com/library/ios/documentation/SpriteKit/Reference/SKScene_Ref/index.html#//apple_ref/occ/cl/SKScene" target="_self" data-renderer-version="2">SKScene</a> class.

It’s so matter-of-fact, right? To me, that says: this is what you do; this is the programming pattern you use. Obviously, SKScene was designed to be subclassed. Most of the SpriteKit framework was, actually (see the entire section on “Use subclassing to create your own node behaviors” within SpriteKit Best Practices). Search the iOS developer library for the word “subclass” and see how often Apple gives specific advice on how to subclass one of their framework classes.

From the UIColor class reference:

Most developers should have no need to subclass UIColor. The only time doing so might be necessary is if you require support for additional colorspaces or color models. If you do subclass, the properties and methods you add must also be safe to use from multiple threads.

Don’t get me wrong: I understand that this proposal only concerns the default setting and that this doesn’t mean that Apple will automatically lock their frameworks down completely. But that’s kinda what the discussion was about on ATP, and well…I guess I just wanted to point out that in the case of games, subclassing is more or less essential. Heck, Apple’s brand new GameplayKit framework relies enormously on subclassing for its Entities and Components system. Basically, it’s expected that you’re going to subclass GKComponent for each separate behavior/functionality that you need to assign to an entity.

Anyway, all of this is to say that if this proposal is accepted, I would expect that more often than not Apple’s framework classes would be marked “not final”…or whatever the opposite of final is. It seems to me like they’re already very explicit about what they don’t want you to subclass, and that those things are few and far between. For example:

You must not subclass the NSIndexSet class.

Not a lot of room for confusion there. But I guess we’ll see what happens once the “NS” prefix is dropped and everything is rewritten with a Swiftier mentality. Maybe Apple will lock more things down. At this point, however, I just don’t see why they would, and making “final” the default seems like it would create more headaches and more work than anything else, with the benefit being a sense of additional safety that perhaps hasn’t proved to be necessary.

  1. Seriously, don’t quote me. I literally don’t know what I’m talking about.

Trying Affinity Designer

When I decided to make all my own art for Corgi Corral, I figured I would use Photoshop CS6 because that’s what I’m most familiar with. However, after making both the corgi and the sheep in Photoshop, I’ve started to realize that there’s a reason people use Illustrator for vector graphics: Photoshop’s tools just don’t cut it. I can’t afford Illustrator, so I went hunting for an alternative and stumbled upon Affinity Designer ($49.99), which happened to be on sale right before Christmas.

I just started messing with it the past few days, and I really like it. When you create a new document, there are preset sizes for Apple devices such as iPad Retina (1024×768 points) and iPhone 6 (375×667 points). All I had to do was watch a couple of short (< 4 minute) video tutorials before I felt like I knew enough to get started with the pen and shape tools, which are all really flexible. Another thing I like is that when you bring up the list of color palettes (PANTONE, Greys, Colors, Gradients, etc.), it also lists any custom palettes you’ve created from within Apple’s color picker. I’ve created a few palettes in Xcode, and I could access them easily from within Affinity Designer. Finally, I don’t have a graphics tablet, so the ability to do stuff like this is pretty great:

Anyway, the app gets great reviews and an iPad version is coming eventually, so if you’re looking for some intuitive, robust vector graphics or pixel art software, you might want to give Affinity Designer a try. It also has a nice dark interface, if that matters to you!

Getting Accelerometer Updates for Games

I’ve read pretty much every tutorial and Stack Overflow question involving accelerometer-controlled SpriteKit games and I’ve noticed that people often use the startAccelerometerUpdatesToQueue:withHandler: method to collect accelerometer data. However, there is another approach (which I use), which is to simply call startAccelerometerUpdates. Confused about the difference, I decided to hit the CMMotionManager class reference and found the following:

An app can take one of two approaches when receiving motion data, by handling it at specified update intervals or periodically sampling the motion data.

Is it just me or do those two things sound kinda the same? Anyway, moving on…under the second approach, “Periodic Sampling of Motion Data,” it says:

To handle motion data by periodic sampling, the app calls a “start” method taking no arguments and periodically accesses the motion data held by a property for a given type of motion data. This approach is the recommended approach for apps such as games. Handling accelerometer data in a block introduces additional overhead, and most game apps are interested only the latest sample of motion data when they render a frame.

(emphasis added)

I just wanted to point this out in case someone is thinking of making an accelerometer game and isn’t sure which method to use.

Creating an Outlined Countdown Timer in SpriteKit with Swift

There’s a reason that most game developers don’t use Apple’s tools: they’re very limited. For instance, with UIKit, you can create a label and easily adjust its stroke color and stroke width. With SKLabelNodes in SpriteKit, those properties don’t exist. Therefore, it is (as of iOS 9 and Xcode 7.2) impossible to create an outlined SKLabelNode without doing some extra work.

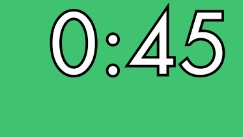
I want my countdown timer in Corgi Corral to be white with a black outline. I combined two excellent tutorials to do this: Creating a Countdown Timer in SpriteKit with Swift and Outline Text in SpriteKit. Here’s the end result:

countdown timer with outline

In order to do this, you’ll need to use the great custom class ASAttributedLabelNode by Alex Studnicka. Just download the zip file from GitHub and copy the ASAttributedLabelNode.swift file into your project.

The timer tutorial has you create a custom subclass of SKLabelNode, adding several functions that compare dates and allow the label to update itself. I changed it to be a subclass of ASAttributedLabelNode instead and added two extra functions: one that formats the time as M:SS (single digit minutes and seconds) and one that sets the attributes of the string (stroke width, color, font, etc.). Here’s the full class:

class CountdownTimer: ASAttributedLabelNode {
    
    var endTime: NSDate!
    
    
    func update() {
        let remainingTime = timeLeft()
        attributedString = stringFromTimeInterval(remainingTime)
        
    }
    
    func startWithDuration(duration: NSTimeInterval) {
        let timeNow = NSDate()
        endTime = timeNow.dateByAddingTimeInterval(duration)
        
    }
    
    func hasFinished() -> Bool {
        
        return timeLeft() == 0
    }
    
    func createAttributedString(string: String) -> NSMutableAttributedString {
        let font =  UIFont(name: "Futura-Medium", size: 65)
        let textAttributes = [
            NSFontAttributeName : font!,
            // Note: SKColor.whiteColor().CGColor breaks this
            NSForegroundColorAttributeName: UIColor.whiteColor(),
            NSStrokeColorAttributeName: UIColor.blackColor(),
            // Note: Use negative value here if you want foreground color to show
            NSStrokeWidthAttributeName: -3
        ]
        return NSMutableAttributedString(string: string , attributes: textAttributes)
    }
    
    func stringFromTimeInterval(interval: NSTimeInterval) -> NSMutableAttributedString {
        let interval = Int(interval)
        let seconds = interval % 60
        let minutes = (interval / 60) % 60
        let timeString = String(format: "%01d:%02d", minutes, seconds)
        return createAttributedString(timeString)
    }
    
    private func timeLeft() -> NSTimeInterval {
        
        let now = NSDate()
        let remainingSeconds = endTime.timeIntervalSinceDate(now)
        return max(remainingSeconds, 0)
    }
}

Next, all you have to do is create a new CountdownTimer in your game’s scene class (by default it’s called GameScene.swift). Assuming your timer is named “timer”, whenever you want the timer to start, call timer.startWithDuration(seconds). In the scene’s update method, you can simply put timer.update().

Note: The end result of this is that you get an SKNode that you can do all sorts of SpriteKit-y things with. However, since it’s not actually an SKLabelNode, the vertical and horizontal alignment methods won’t work. You’ll have to position it like a regular node.

Obviously you can change the font to whatever you want, as well as the time format. And if you want to be able to have multiple timers with different attributes, you could always override the initializer to take a font name, size, color, etc. In fact, I might do that just to make it more flexible. Anyway, hope this helps somebody!

#DPP2015: Conclusion

Here are my final week and a half’s worth of photos for the December Photo Project! They’re all Live Photos processed into GIFs using Alive! and you can also look back at weeks One and Two. Oh, and I’ve set it so that GIFs don’t play automatically on this site (helps it load faster), so you’ll have to click on them to set them in motion.

Continue reading

Random Thought

I was just thinking about those weird rumors about a potential 15″ MacBook Air. Most Apple bloggers seem to think that the Air line will be phased out soon after being basically upstaged by the even slimmer 12″ MacBook.

I’m wondering: is it possible that the MacBook Air would essentially become the MacBook Pro instead? I’m guessing not, since the Pro has more ports and a discrete graphics card option and there’s no way to cram all that into a case as thin as the current Airs…right? What if Apple just had one laptop line called “MacBook” with 12, 14, and 16-inch screen sizes and upgrade options that would please Pro users?

Yeah I know, that probably won’t happen. But at this point, I’m so desperate for a laptop that I can use for development that’s as light as an Air and as powerful as a Pro that I’m willing to believe anything!

Favorite Christmas Albums

I’m a bit fussy about Christmas music. I tend to favor classical and jazz arrangements over pop, and while I’ve been to my fair share of Mannheim Steamroller concerts (and one Trans Siberian Orchestra concert), I wouldn’t rank their albums among my favorites. That being said, here are my top three favorites:

1. Christmas Adagios – Various Artists

I picked up Christmas Adagios at Barnes & Noble years ago and couldn’t convince anyone else that it was good because of the way the cover looked: like a sappy compilation of mediocre Christmas music. However, that couldn’t be farther from the truth. Featuring the likes of Pavarotti, the Choir of King’s College, the Vienna Philharmonic, and more—this is really the ideal classical Christmas album. If you’re looking for Christmas music that will create a solemn, sacred, reflective atmosphere: this is it. And with a whopping 45 tracks for only $11.99, it’s an absolute steal. It’s hard for me to pick a favorite track, but if I had to, I’d pick Pavarotti’s performance of “Ave Maria.” Gives me chills every time!

2. Jingle All The Way – Béla Fleck and the Flecktones

Quite possibly the strangest Christmas album I’ve ever heard, Jingle All the Way is a wild ride from start to finish. Béla Fleck is a world-reknowned banjo player, and yet I wouldn’t call this a bluegrass album. Instead it’s sort of a fusion of jazz and bluegrass that adds a bizarre yet fresh twist to a number of Christmas classics. Most of the tracks are purely instrumental, though a few feature Tuvan throat singing! My favorite tracks are “Sleigh Ride,” “Linus And Lucy,” and their great instrumental cover of Joni Mitchell’s “River.”

3. A Charlie Brown Christmas – Vince Guaraldi Trio

I don’t feel like this one needs a lot of explanation. I’ve been a Peanuts fan since I was a kid and nothing gets me in the holiday spirit like the soundtrack to A Charlie Brown Christmas!

Note: If you see big swaths of white space under the album names, those are supposed to be widgets where you can preview the songs. I don’t know how they’ll appear on various devices (or the RSS feed), so I thought I’d mention that.

Update: uBlock blocks the iTunes widgets, and I bet other ad blockers do too. Feel free to whitelist this site: I don’t have any actual advertisements on it.

Update #2: I removed the widgets because they were causing some strange behavior in Newsblur, which is my favorite RSS reader.

#DPP2015: Week One

I wasn’t originally going to post my December Photo Project pictures here, but changed my mind for two reasons. First, they’re Live Photos, which makes them slightly more interesting to Apple fans. Second, I’m hoping they’ll provide a little window into my life and help people get to know me a bit.

Without further ado, here’s Week 1:

December 1
Griffin the Weimaraner
This is Griffin, our Weimaraner. He’s my husband’s dog and he’s pretty much a big lovable dope.

December 2
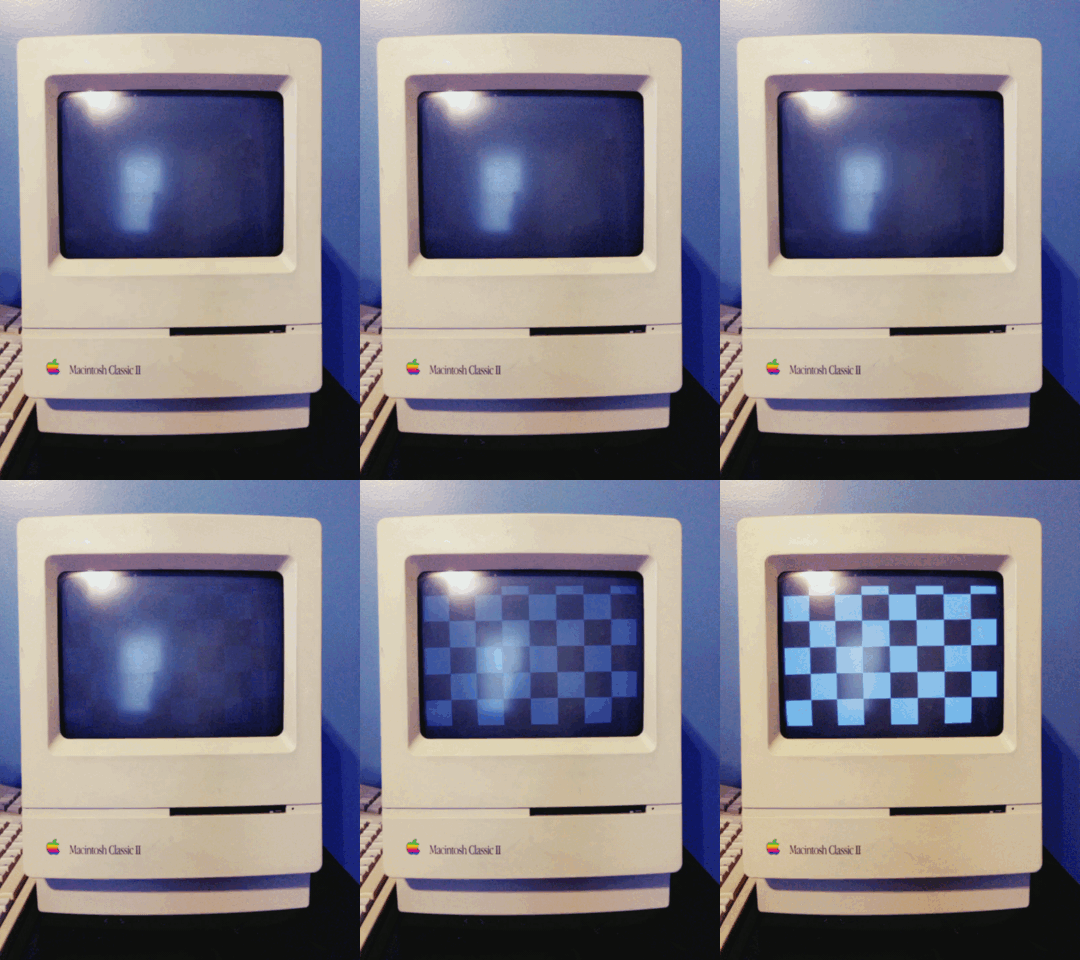
Mac Classic II
This is the Mac Classic II that I picked up for $15 at a flea market a few years ago. It needs new capacitors, hence the checkerboard pattern. I don’t have the time to mess with that right now, so I may just send the logic board through the dishwasher again for a temporary fix! When I did get it to boot up, I found out that it used to belong to a dentist’s office…I think in Illinois somewhere. Fortunately they were smart enough to delete all the patient information off of it!

December 3
Hot chocolate with marshmallow
‘Tis the season for hot cocoa and marshmallows!

December 4
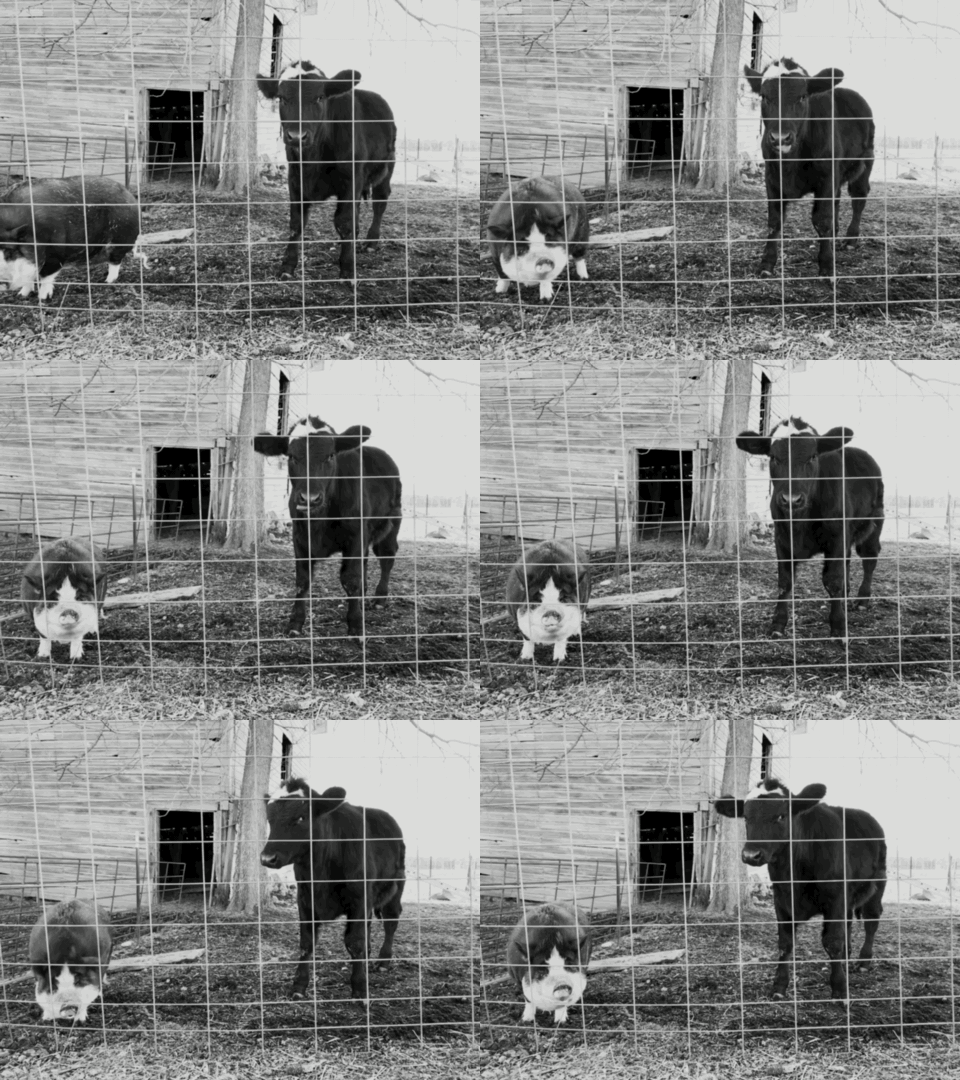
Moe the pig and Molly the calf
Our pet pig, Moe, and his buddy Molly, a calf that my husband rescued and bottle-fed after her mother died.

December 5
Doane Christmas Concert
Every year I go to the Christmas concert at Doane College, my undergraduate alma mater. The piece they were performing when I took this is an arrangement of Pavel Chesnokov’s “Salvation is Created” for choir and band. Here’s a recording of them closing the Christmas concert with the same piece in 2009. It’s one of my favorites, and I pretty much cry whenever I hear it.

December 6
Daisy the corgi
Daisy thinks she’s a cat and spends most of the day sitting either on the top of the couch or in the bay window itself.

December 7
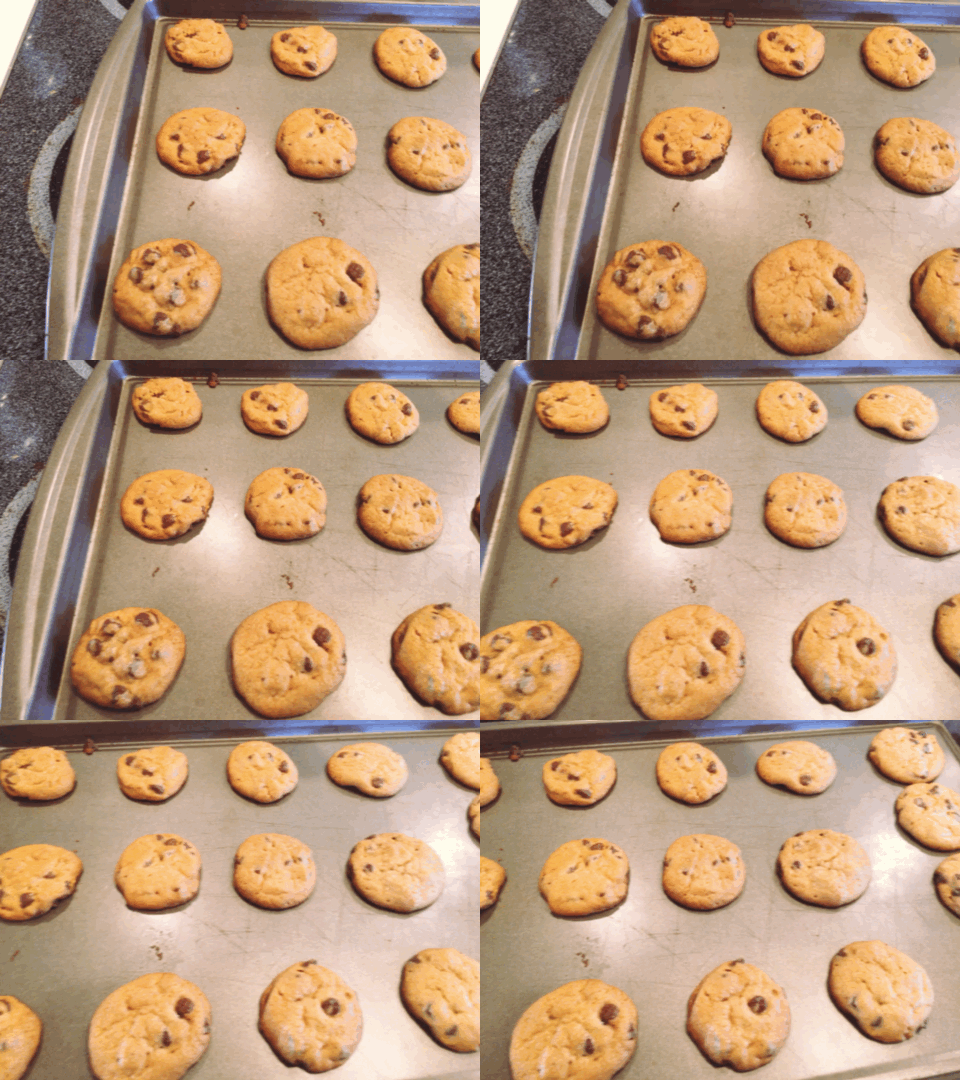
Chocolate chip cookies
I made some chocolate chip cookies today and this my attempt to do a “flyover” of them. lol.

Again, all of these Live Photos were converted to GIFs using Alive!.

Accelerometer Mysteries

Ok, I feel like I need to establish my math creds before I begin talking about this: I was good at math once. I got an A or A+ in every math class I ever took, including AP Calculus. My problem is, I don’t remember a darn thing from any of those classes, least of all trigonometry.

And as it Turns Out™, there’s some trig involved in making games. :-)

I get how the accelerometer works: it measures the rotation of the x-, y-, and z- axes and returns a value between -1 and 1. I’ve been using a Ray Wenderlich tutorial on the accelerometer to help me figure out how to translate that data into a velocity vector for my game character (I’d link to it, but it’s in their iOS Games book). The tutorial writers, ostensibly pressed for time and/or chapter space, included a handy Swift file full of convenience methods for working with 3D vectors. The only problem with that is it’s making it harder for me to grasp what’s really happening and why. My “move” function for my character feels a little bit like a black box: accelerometer data goes in, a velocity vector comes out, and I’m not really sure what happened in between.

From what I can gather, the reason for working with 3D vectors to begin with is because I need to define a neutral orientation for users to hold their phone. Otherwise, people would have to play my game with their devices held perfectly flat.

To help solve this, the RW team created their own “Vector 3” struct, with x, y, and z properties. There’s a function to determine the magnitude of the vector, which I understand, as well as a couple of functions for normalizing the vector, which I feel like I’m on the verge of understanding. Where it all breaks down for me is two included functions that calculate the “dot product” and “cross product” of two vectors.

I’ve never heard of those mathematical functions, and looking up their definitions hasn’t helped me much. Here’s how they are used in context:

In defining neutral orientation constants:

let ay = Vector3(x: -0.78, y: 0.0, z: -0.61)
    let az = Vector3(x: 0.0, y: -1.0, z: 0.0)
    let ax = Vector3.crossProduct(Vector3(x: 0.0, y: -1.0, z: 0.0), right: Vector3(x: -0.78, y: 0.0, z: -0.61)).normalized()

In translating to a 2D vector:

let rawData = Vector3(x: CGFloat(motionManager.accelerometerData!.acceleration.x), y: CGFloat(motionManager.accelerometerData!.acceleration.y), z: CGFloat(motionManager.accelerometerData!.acceleration.z)) // Raw accelerometer data
        
        acceleration2D.x = Vector3.dotProduct(rawData, right: az)
        acceleration2D.y = Vector3.dotProduct(rawData, right: ax)
        acceleration2D.normalize()

Anyway, all that’s to say that I can use the accelerometer to move my character (without any rotation of the sprite…that’s on my to-do list for tomorrow) and it basically works. I just don’t know why it works. Maybe I don’t need to?

Does anybody else have sections of their own code that they don’t necessarily understand completely? It sounds like bad practice but maybe I can get away with it this time.